Packing for an overnight hike can be daunting for the first time, it comes down to finding a balance to take the things you will need, the things you might need and leaving the things you definitely won’t need. In this post I will cover the things I tend to take with me and why, hopefully to shed some light over this issue for everyone getting into hiking. This guide will cover most hikes of varying duration but will be focused on 2-3 day hikes, listed below is a complete breakdown list of all the gear discussed.
The first thing we will cover is the pack that you will need, how big you will need comes down to a number factors. If you plan on traveling alone then you will need a larger pack than if you would if you plan on traveling with a group. This is due to the fact that there are a lot of things that you will only need one of within small groups consisting of two to three people. Some examples of such gear are shovels, cooking equipment, first aid, sunscreen, tarps, compass/map and tent.
A Pack around 80L would have plenty of space for a solo hiker, and packs around 60L’s would do a pair of hikers nicely too(this is assuming that your gear is well suited and of appropriate sizing). It is also handy to have a pack that has points on the exterior for you to tie this to that either take up too much room in your pack or don’t fit, and example of this would be a sleeping mat.
When it comes to shelter and sleeping arrangements there are varying options that have different levels of protection and comfort. The most basic of setups is a hitch between two trees with a second hitch on the group and a sleeping bag. This provides limited protection from wind and insects and isn’t the most comfortable solution but requires you to carry the least amount of gear. Simply run a rope between two trees and peg your hitch over the rope to provide cover from any possible rain, even if rain isn’t predicted and the sky is clear, you should still always set this up, you don’t want to get up in the middle of the night doing this if the weather turns. Lay the second hitch on the ground under your shelter to sleep on it, this will reduce your loss of heat into the ground and reduce dew. Roll your sleeping bag out under your shelter and you’re good to go.
Another sleeping solution is that of a tent and sleeping mat, this arrangement provides you with more protect from the elements and more comfort, however requires you to carry more gear. When it comes to a tent, a typical two man tent will do as the cheapest option, or you could invest in a hiking tent, they are typically much smaller and lighter and will more often then not, fit in your pack. In addition a sleeping mat will not only provide extra comfort for sleeping, but will also reduce your loss of heat. The sleeping bag you take depends on the season you go in and your shelter, in winter you will need a fairly colder rated sleeping bag, depending on the area you intend to hike. If you are going for a tent/sleeping mat solution you can get away with a smaller sleeping bag than that of a hitch and no mat solution. These are only suggestions and you can take any combination of sleeping/shelter gear that you choose, although you will definitely need at least a sleeping bag and something to provide cover from the elements.
Food and hydration are another thing to consider, depending on how long you are hiking determines how much to pack. When it comes to water, hotter days and longer hikes means taking more, try to pack at least 3L of water per day of hiking. The problem with water is its obvious weight, adding more water adds weight quickly. A good way around this if you are hiking somewhere that you know you will come across fresh water sources regularly or have a map indicating where fresh water sources are available, is the use of a filter straw and or filter tablets. Drinking directly from a lake or river is never a good idea even if the water looks clear and clean, as you never know what may be up stream and what bacteria might be in the water. Bacteria from animal waste can often be contaminating the water source, and drinking this contaminated water can make you very ill and potentially be dangerous. A filter straw is the most convenient solution, I personally believe that the sawyer mini is the best on the market. This allows you to drink straight from a stream or fill your bottles up with filtered water. Filter tablets will however will not remove physical contaminants and will add a slightly off taste to the water but will remove harmful bacteria. If you don’t go with either of these solutions, boiling the water and letting it cool before you drink it is another option.
When picking what food to take, dehydrated food is your best option as it doesn’t need to remain cool and is often the lightest compact solution. Rice is a great example and also provides lots of energy, another solution is canned foods, this is okay for a hike over one or two nights if coupled with dehydrated foods as canned foods are often heavier and take up more room in your pack. It is also a good idea to pack plenty of snacking food to eat for when stopping for breaks on your hike, such snacking food should include energy/muesli bars and foods of that nature.
Cooking your food and boiling your water is another thing to consider, often when hiking in a national park campfire restrictions apply and so a excellent option is to use a compact gas stove which screws onto the top of a gas canister which also serves as the base and stand to your cooker. Even without a fire restriction this gas cooker is much more convenient and controllable, the gas canister itself lasts a surprisingly long time; even when cooking for a couple of people and with moderate use a single large canister will last 3 or 4 nights. For cookwear a compact hiking cook set or mess kit will do nicely, with a pot that serves well for boiling water and cooking rice and a pan for any canned food you might want to heat up or anything else you choose to cook in it. Don’t forget cutlery to eat with.
Other pieces of gear that are essential for your pack are a first aid kit, this can be potentially life saving, they are relatively cheap and there should be at least one in someone’s pack, try to pack it where it can be accessed quickly and easily. It is also a good idea to know what everything in the kit is for and how to use it, furthermore proper first aid training is never a bad idea as it could potentially save a life. The most versatile tool in any pack is a knife, it doesn’t have to be anything special nor large, but a simple pocket knife or multitool is a must, you might not need it, but they have a million different applications.
More gear to consider is rope, which can be used in shelter making, tying things to your pack and many other uses. A collapsible shovel for building a fire pit, or digging a toilet hole (as well as toilet paper), some shovels come with a saw blade on the side for cutting small bits of wood for a fire. Sunscreen, getting burnt can be painful and uncomfortable, keep in mind you can even get burnt on a cloudy day.
Breakdown list of things covered above:
- Hiking bag
- Sleeping bag
- Tarp(bivy) or tent
- Rope
- Water bottles
- Purifying tablets or filter straw
- Dehydrated food
- Cooking set
- lighter
- Hiking gas cooker
- FirstAid kit
- Torch
- Raincoat or rain poncho
- Multitool / knife
- Collapsible shovel
- Toiletpaper
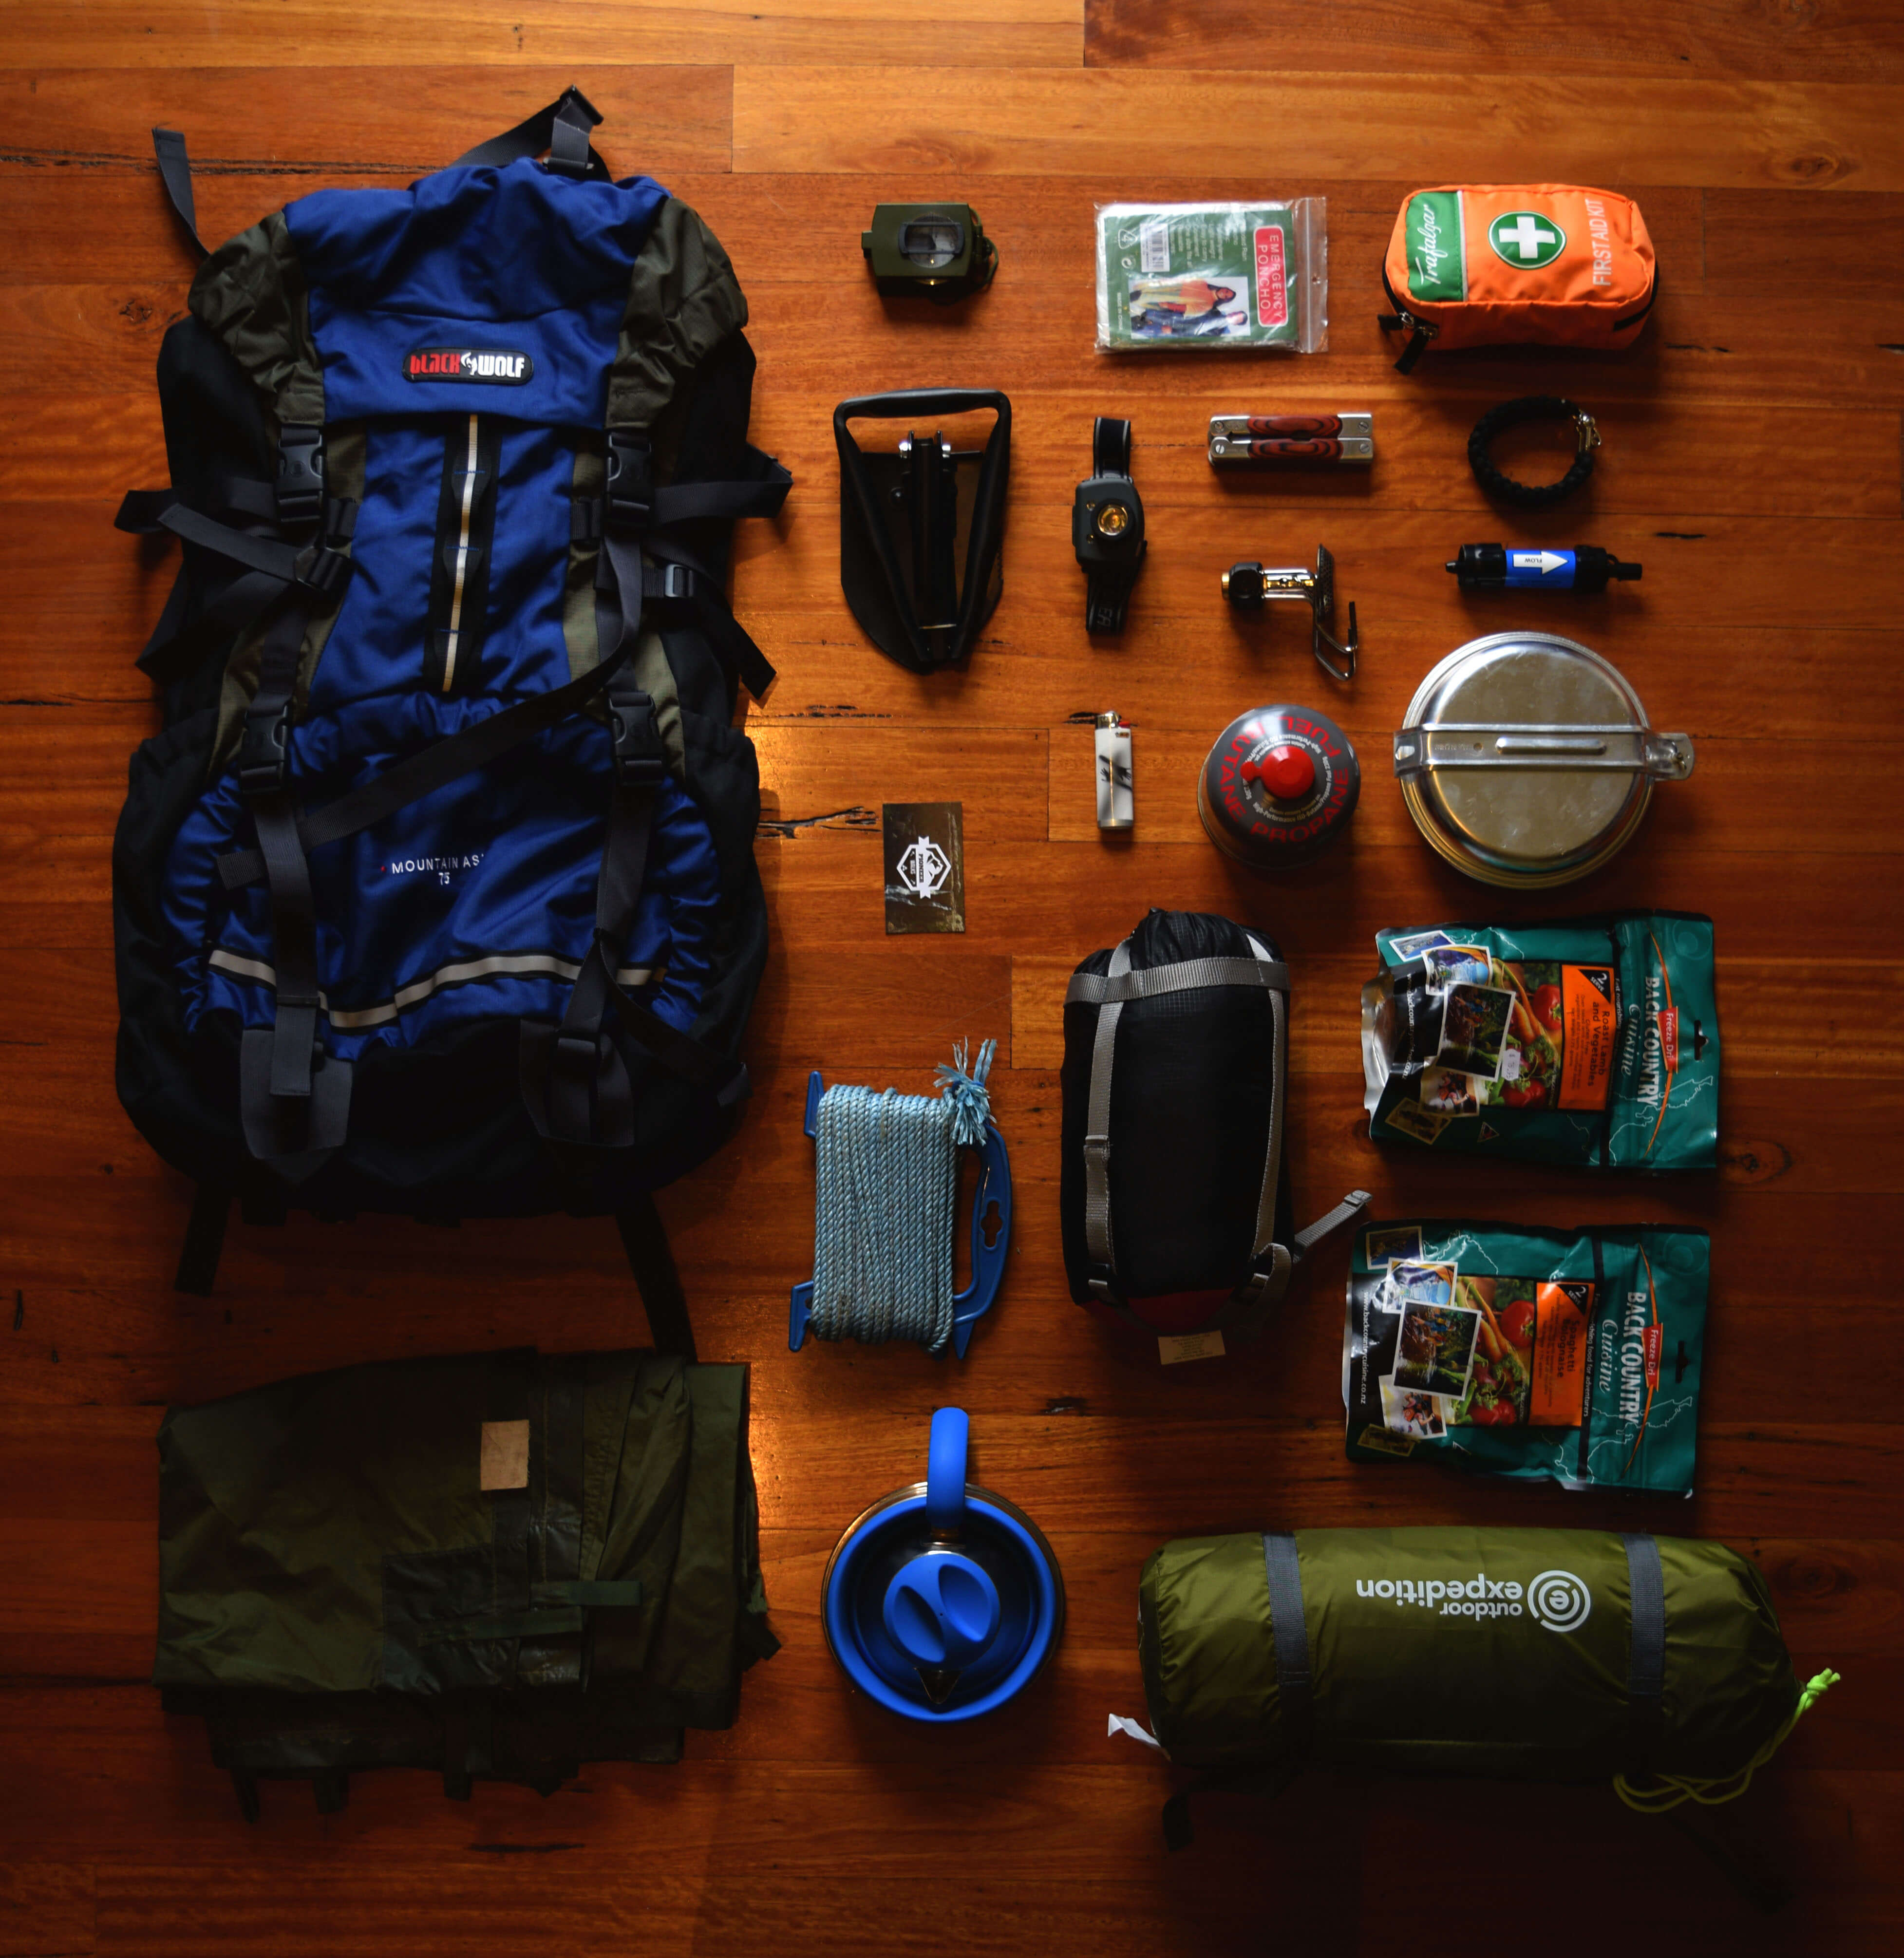
Keep in mind that the above image is missing some of the gear noted above and so when packing please refer to the guide itself and not this image